Linux 4.8 introduced a new GPIO user space subsystem for accessing GPIO. This tutorial provides an introduction to the new Character Device GPIO and explores how to control GPIO from the command line.
sysfs GPIO
User-mode GPIO (General Purpose Input/Output) has historically been performed via the legacy “integer-based”sysfs pseudo file system. For example, to set GPIO25, one would:
# echo out > /sys/class/gpio/gpio25/direction
# echo 1 > /sys/class/gpio/gpio25/value
GPIO access via this legacy sysfs interface has been deprecated since version 4.8 of the Linux kernel.
chardev GPIO
The new way of doing GPIO is via the “descriptor-based” character device ABI (Application Binary Interface). The interface is exposed at /dev/gpiochipN or /sys/bus/gpiochipN where N is the chip number.
Outside of ensuring all allocated resources are cleaned up on closing, the main feature of this new interface is a discovery mechanism, mitigating the need to use magic numbers to address IO. Other new features include open-drain I/O support and the ability to read and set multiple I/O lines at once. Going forward, new features will only be supported in the chardev GPIO.
Unfortunately the new interface prevents manipulating GPIO with standard command line tools (i.e. echo). Dedicated user-mode tools are now required.
The Linux kernel is distributed with three basic user-mode tools written primarily for testing the interface. The source can be found in linux/tools/gpio/
The three tools are:
- lsgpio – example on how to list the GPIO lines on a system.
- gpio-event-mon – monitor GPIO line events from userspace.
- gpio-hammer – example swiss army knife to shake GPIO lines on a system.
To cross-compile, simply use:
# make ARCH=arm CROSS_COMPILE=arm-linux-gnueabi-
lsgpio is the most useful of these debug tools, however none of these tools will allow the user to configure, set and clear GPIO lines.
Libgpiod
Libgpiod (Library General Purpose Input/Output device) provides both API calls for use in your own programs and the following six user-mode applications to manipulate GPIO lines:
- gpiodetect – list all gpiochips present on the system, their names, labels and number of GPIO lines
- gpioinfo – list all lines of specified gpiochips, their names, consumers, direction, active state and additional flags
- gpioget – read values of specified GPIO lines
- gpioset – set values of specified GPIO lines, potentially keep the lines exported and wait until timeout, user input or signal
- gpiofind – find the gpiochip name and line offset given the line name
- gpiomon – wait for events on GPIO lines, specify which events to watch, how many events to process before exiting or if the events should be reported to the console
To cross-compile Libgpiod for the Raspberry PI on your Ubuntu 18.04 host, first install the following prerequisites:
sudo apt-get install autoconf autoconf-archive libtool libkmod-dev pkg-config
Then download, cross-compile and install.
wget https://git.kernel.org/pub/scm/libs/libgpiod/libgpiod.git/snapshot/libgpiod-1.1.1.tar.gz
tar -xzf libgpiod-1.1.1.tar.gz
cd libgpiod-1.1.1/
./autogen.sh --enable-tools=yes --host=arm-linux-gnueabi --prefix=/home/<home dir>/export/rootfs ac_cv_func_malloc_0_nonnull=yes
make
make install
Setting ac_cv_func_malloc_0_nonnull=yes will prevent an undefined reference to `rpl_malloc’ error at linking.
Usage
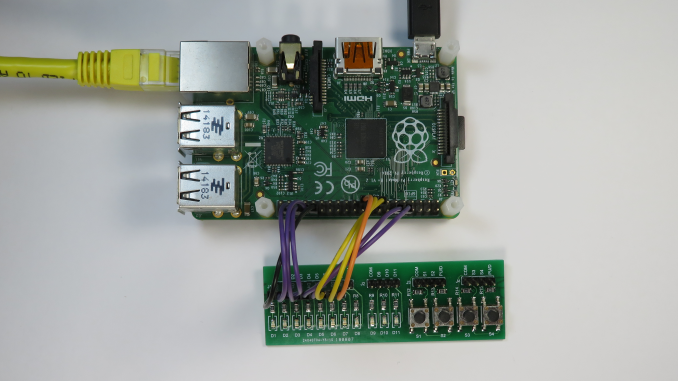
Below is example usage on a Raspberry PI Model B+ V1.2.
To detect/list GPIO character devices:
# gpiodetect
gpiochip0 [pinctrl-bcm2835] (54 lines)
To list the I/O lines available on this device:
# gpioinfo pinctrl-bcm2835
gpiochip0 - 54 lines:
        line   0:       "SDA0"       unused   input  active-high
        line   1:       "SCL0"       unused   input  active-high
        line   2:       "SDA1"       unused   input  active-high
        line   3:       "SCL1"       unused   input  active-high
        line   4:  "GPIO_GCLK"       unused   input  active-high
        line   5:  "CAM_GPIO1"       unused   input  active-high
        line   6:    "LAN_RUN"       unused   input  active-high
        line   7:  "SPI_CE1_N"       unused   input  active-high
        line   8:  "SPI_CE0_N"       unused   input  active-high
        line   9:   "SPI_MISO"       unused   input  active-high
        line  10:   "SPI_MOSI"       unused   input  active-high
        line  11:   "SPI_SCLK"       unused   input  active-high
        line  12:         "NC"       unused   input  active-high
        line  13:         "NC"       unused   input  active-high
        line  14:       "TXD0"       unused   input  active-high
        line  15:       "RXD0"       unused   input  active-high
        line  16: "STATUS_LED_N" "ACT" output active-low [used]
        line  17:     "GPIO17"       unused   input  active-high
        line  18:     "GPIO18"       unused   input  active-high
        line  19:         "NC"       unused   input  active-high
        line  20:         "NC"       unused   input  active-high
        line  21:     "GPIO21"       unused   input  active-high
        line  22:     "GPIO22"       unused   input  active-high
        line  23:     "GPIO23"       unused   input  active-high
        line  24:     "GPIO24"       unused   input  active-high
        line  25:     "GPIO25"       unused  output  active-high
        line  26:         "NC"       unused   input  active-high
        line  27:  "CAM_GPIO0"       unused   input  active-high
        line  28:    "CONFIG0"       unused   input  active-high
        line  29:    "CONFIG1"       unused   input  active-high
        line  30:    "CONFIG2"       unused   input  active-high
        line  31:    "CONFIG3"       unused   input  active-high
        line  32:         "NC"       unused   input  active-high
        line  33:         "NC"       unused   input  active-high
        line  34:         "NC"       unused   input  active-high
        line  35:         "NC"       unused   input  active-high
        line  36:         "NC"       unused   input  active-high
        line  37:         "NC"       unused   input  active-high
        line  38:         "NC"       unused   input  active-high
        line  39:         "NC"       unused   input  active-high
        line  40:   "PWM0_OUT"       unused   input  active-high
        line  41:         "NC"       unused   input  active-high
        line  42:         "NC"       unused   input  active-high
        line  43:         "NC"       unused   input  active-high
        line  44:         "NC"       unused   input  active-high
        line  45:   "PWM1_OUT"       unused   input  active-high
        line  46: "HDMI_HPD_P"       unused   input  active-high
        line  47: "SD_CARD_DET"      unused   input  active-high
        line  48:   "SD_CLK_R"       unused   input  active-high
        line  49:   "SD_CMD_R"       unused   input  active-high
        line  50: "SD_DATA0_R"       unused   input  active-high
        line  51: "SD_DATA1_R"       unused   input  active-high
        line  52: "SD_DATA2_R"       unused   input  active-high
        line  53: "SD_DATA3_R"       unused   input  active-high
Display help for the gpioset command:
# gpioset --help
Usage: gpioset [OPTIONS]  = = ...
Set GPIO line values of a GPIO chip
Options:
  -h, --help:           display this message and exit
  -v, --version:        display the version and exit
  -l, --active-low:     set the line active state to low
  -m, --mode=[exit|wait|time|signal] (defaults to 'exit'):
                tell the program what to do after setting values
  -s, --sec=SEC:        specify the number of seconds to wait (only valid for --mode=time)
  -u, --usec=USEC:      specify the number of microseconds to wait (only valid for --mode=time)
  -b, --background:     after setting values: detach from the controlling terminal

Modes:
  exit:         set values and exit immediately
  wait:         set values and wait for user to press ENTER
  time:         set values and sleep for a specified amount of time
  signal:       set values and wait for SIGINT or SIGTERM
To toggle GPIO25 high for 1 second:
# gpioset --mode=time --sec=1 pinctrl-bcm2835 25=1


Hello
I have a question I didn’t cross compile
(I don’t have another computer set up for that ) I compiled
on the raspberry pi 3 and everything else works
the gpio pins are reached and turn on and off those pins correctly
however the gpioinfo doesn’t get the labels
#gpioinfo pinctrl-bcm2835
or #gpioinfo gpiochip0
command gives
line 0: unnamed unused input active-high
line 1: unnamed unused input active-high
whereas you are gettting
line 0: “SDA0” unused input active-high
line 1: “SCL0” unused input active-high
notice the label SDA0 and SCLO?
For some reason the info is not seen
maybe when you cross compiled or that you have the B+ version
you are getting the correct results?
anyway could you try and compile on the raspberry pi instead of cross
compiling most people will compile on the raspberry pi
anything needed for the raspberry pi
I figure you did that to keep your raspberry pi clean with less clutter
thanks if you can confirm this
your blog is very clear and would even be better
if you added a raspberry pi compile
and confirm the output of gpioinfo again
thanks
Joe
Same here
I found the libgpiod , but I’m wondering how we can switch mode in to out a particular line.
To be concrete, how can I translate the following wiringPi commands
* gpio mode 2 out
* gpio write 2 1
* gpio mode 0 down
* gpio mode 0 up
If I well understood , gpio write can be translated to gpioset 0 2=1, but what about the mode one ?
From what I’ve been able to read, it seems that libgpiod doesn’t allow any control over the pull-ups and pull-downs :-/
I did a bit more searching and there’s some discussion in https://github.com/brgl/libgpiod/issues/31
The gpio pin names weren’t added for rpi3 until the Linux 4.20 kernel. So you’ll see “unnamed” for earlier kernels unless you recompile the device tree. FWIW the names are “GPIO0” … “GPIO47” for the first 48 pins, so not very useful.
Hi,
when you say “To cross-compile Libgpiod for the Raspberry PI on your Ubuntu 18.04 host, first install the following prerequisites:” that procedure does not cross-compile, but produces binaries and libs for the host. I have tried adding the ARCH=arm CROSS_COMPILE=arm-linux-gnueabihf- CC=arm-linux-gnueabihf-gcc but does not work (complains about not finding linux/gpio.h). From there I try to add CFLAGS and stuff like that but I end up in not finding headers related to size_t… Do you have the exact procedure to cross-compile in your case?
Thanks
I cannot get cross-compiling to work. I cross-compile constantly and have other programs compile just fine.
This one produces this error near the end of make:
./.libs/libtools-common.a: error adding symbols: Archive has no index; run ranlib to add one
collect2: error: ld returned 1 exit status
I solved the problem. In your example, I just had to change
–host=arm-linux-gnueabi in the ./autogen.sh command to:
–host=arm-linux-gnueabihf
Would be nice if you’d actually discussed the ioctl calls, or at least provided pointers to the relevant man pages, instead of just mentioning them and then ignoring them for the rest of the post. Userspace programs are nice and all, but you do no service to anyone by ignoring the fundamentals.
Hi,
You have cross-compiled the library in the host, but you need to download the new cross-compiled library to the target. Are you missing this step?
Thanks
This article seems quite stale & un-informative now. I suppose this is due to the inevitable march of “progress”. This specific article though seems particularly in need of refresh or deletion. Two reasons for this I think:
1. `gpiod` is a package of “user tools” for the chardev API. It’s available for RPi via the usual apt channel.
2. The article fails to mention the “elephant in the room”: the chardev API – as currently implemented – has one “feature” that is almost guaranteed to put users off. It is incapable of setting a GPIO pin to its non-default state (HI or LO) persistently.
Not sure if I understand your second point but in my case I ran a small test app on the RPi with 3 LEDs connected to pins 36, 38 and 40 and then controlled in C code.
When I ran my C application all was working fine and at the end I put all LEDs to “on” and they kept their state after leaving the application. Used version 1.6.2, not sure if that issue is only recently solved?